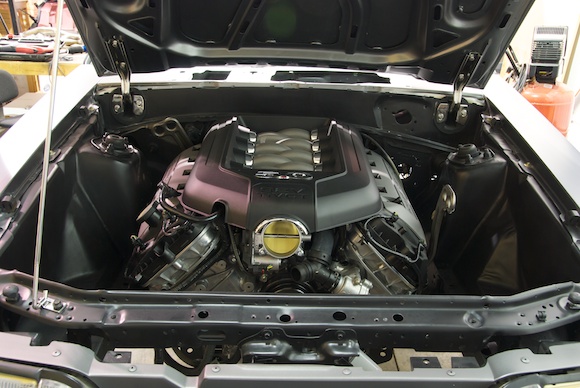
In case you have not seen or heard the recent rumblings in the Ford Mustang news sector, the team here at StangNet has been hard at work on another project, following closely on the heels of the Shelby GT500 Glassback Project. The latest & greatest is dubbed ‘Built to Cruise’ and it involves mating the new 2011 Ford Mustang GT’s power plant into a Fox-body Mustang coupe. Project Built to Cruise has been in the works since the spring of 2010. The initial months were mostly a lot of R&D for fitment of the new 2011 5.0 engine offered by Ford Racing to fit in the early Fox. We also had to plan and obtain parts for a modular swap, which has become quite common the past few years, and with the addition of the Control Pak kits offered by Ford Racing, the swaps have been even easier. The StangNet team has also been posting tidbits of our progress via the Mustang Forums and our dedicated update blog which you can see on our homepage as well as at blog.fox50swap.com. In mid-September, we received the Control Pak from Ford Racing and a new K-member from J&M; just a week prior, we got the car back from paint. It’s go time! So here we are, presenting you with an official update to give you a synopsis of our progress and break it down into some detail. Follow the jump to get all the juicy details.
StangNet has owned a 1989 Mustang Notchback (coupe) for about 10 years off and on. We kept buying the car back from friends because we did not want to let the car get away. Late in 2009, Ford Racing approached us about the new 5.0 engine and wanted to know if we wanted to do a swap. Well, we all know the answer. So…StangNet’s ‘Built to Cruise’ project was born.
Breaking Her Down

Starting in about February 2010, we started the break down and disassembly of the Notchback Mustang. The car was very clean, but we wanted to basically do a semi-restoration where could. After 20 years, a lot of the parts could use some TLC and/or replacement. We turned to Late Model Restoration and CJ Pony Parts for help, guidance, and parts. A detailed list of the parts we have amassed can be found here. As we start putting the Mustang back together, we will cover in more detail what was replaced, modded or fixed. We pretty much took the car all the way down to a shell. The only thing left on the car before being sent to paint was the dash frame and wiring in the dash area, steering column (for moving it around) and the wiring harness that feeds down the driver side through the firewall. This harness will be used to power the headlights, the wiper motor and the general feed of power to the car’s dash. The battery will be relocated to the trunk and a main wire will feed back through the car to this harness. The only other harness is the driver side to the rear which will feed the rear tail lights, fuel pump, etc. We did keep all of the parts that came off the car; this way, as we do the build, we won’t kick ourselves for throwing something away that we may end up needing.
Body Tweaks
Having a 1989 Ford Mustang meant there we some things that the car did not have that were in ‘90 and ‘91 models. In 1991, Ford made a change to the front fenders and opened up the wheel wells allowing for bigger wheels and tires. We knew this was the way to go for this build. Also on the Mustang was some slight damage to the passenger side radiator core support and front bumper cover. Because we knew that the hood would be up a lot showing off the new 5.0, we wanted to have a super clean front end. To start with, we needed a new radiator core support. You can get an ‘89 core support new from Late Model Restoration (LMR), but it is not the entire core support; it is missing the bracing plates and such from the back side. So, we opted for the 1990 and up radiator core support from LMR, which is complete. In 1990 Ford changed some of the bumper structure which was probably a safety regulation change. This required us to obtain some 1990 or later front bumper shocks for the swap. We sourced these used from Prestige Mustang. Also, the bolt hole location for these in the frame is different, so we had to drill some holes for fitment. All other parts including the bumper cover, bumper support core, and other items are all interchangeable. This gave us a clean swap and resulted in a great ‘new’ look for our project. While at the body shop, we went ahead and shaved (filled in) the antenna location on the passenger side fender for a clean look. Today, with iPods and trick head units for the stereo, we do not foresee needing a radio!
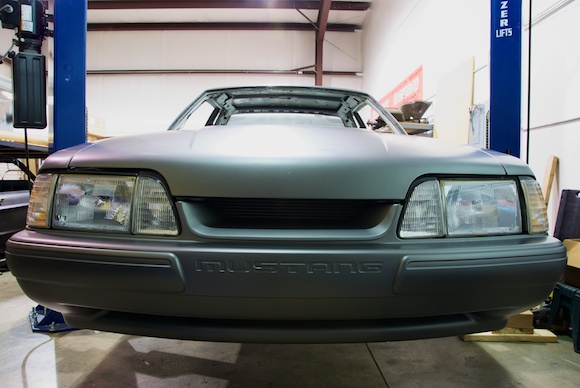
We worked with Classic Design Concepts on visual concept ideas for our ‘Built to Cruise’ Project. One of the ideas included a ‘grill delete’ look for the front of this LX Mustang. To do this, we removed the ‘Pony’ bar and emblem area of the front bumper cover. Then, CDC designed an insert to mask the area affected. They created the CDC LX Mustang Grille Bar Eliminator which is now available to the entire aftermarket.
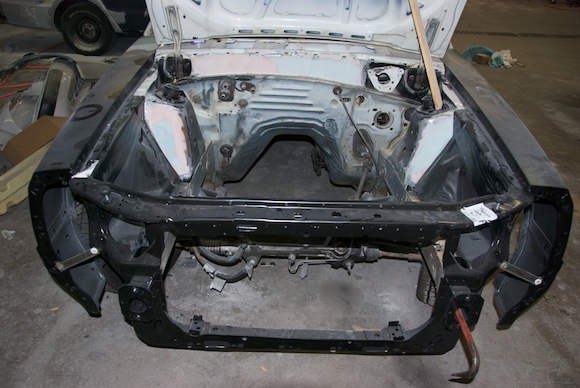
As everyone knows, the engine bays of 79-04 Mustangs have got to be the ugliest ever made. Holes are everywhere. We imagine they were tailored that way to fit all the different engine combinations and components needed during the years. To show off this new 5.0 engine meant we needed to clean up the engine bay. To start off, we obtained some smooth fender aprons from LMR. Since the entire front end was coming off, we knew replacing these would be easy, but we are told they can be replaced without removing the front core support. We also smoothed up the front facing sides of the strut towers and the upper firewall by welding up the holes then smoothing it all down. We opted to use a body colored engine bay but rather a nice ‘black out’ look. We used SEMS Black Trim Paint to achieve a nice satin look. You can get this is the quart size for guns (needs to be reduced 1:1) or in a ready to go spray can.

Before paint, we placed most exterior parts on the car. For a run down…
- New front ‘91 fenders (requires sourcing 1991 fender liners)
- New OEM front bumper cover
- New OEM rear bumper Cover
- All new side body moldings
- All new exterior trim around the doors and A-pillars, etc.
- New cowl and trim
- Window moldings were not replaced as these cannot be sourced new
- New door and trunk locks in black on black
- New mirrors and painting them SEMS Trim Black
- New rear coupe quarter windows (still awaiting driver side, tool is damaged at Carlite)
- Miscellaneous trim parts/screws
- For a detailed parts list, visit http://www.stangnet.com/btc-parts
Paint
When we started dreaming up and designing the project, we wanted to go for a different look, something that is not done often and would cause people to take a second look. We wanted the BTC to have a dark and mysterious feel about her. We chose the 2010-2011 Ford ‘Sterling Gray Metallic’ (code: UJ) as the paint color. We opted for a ‘suede’ paint job which is what hot rodders refer to when they paint a car ‘flat’ or ‘satin’. To achieve this we had to go with a ‘flattened’ clear. With the combination of this color in ‘satin’, some black wheels and a black body stripe, we think we will hit the mark.
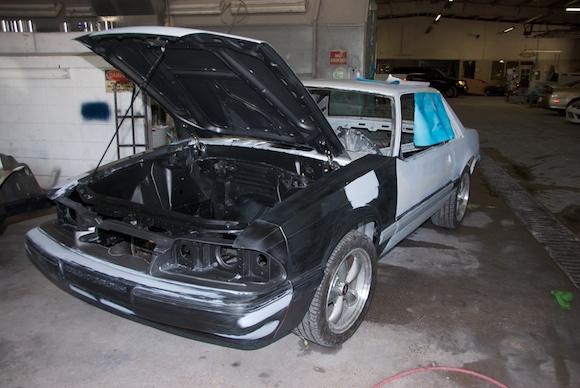
United Auto Collision in Auburn, AL did all the body work and paint for us on the project. After they rebuilt the front end, the car was assembled, the gaps were tightened up, and all dings were fixed and the paint was sprayed. The car was sprayed with 2 coats of sealer, 2 good coats of base, then cleared with PPG 2060 ‘Flattened’ clear with a 6:1:1 ratio to get our ‘suede’ look. Thanks to Keith over at Ice Nine Customs for helping us get the right combination with the clear to get the best results.
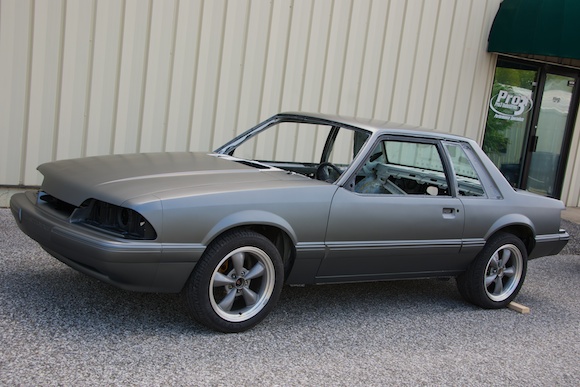
Where we are…
Project ‘Built to Cruise’ is now back at the StangNet shop. We have almost all the parts needed to complete the project. We are still waiting on some parts to be tweaked and made but details are to come. So far, we have had a blast working on this project and in the coming weeks we will be detailing quite regularly our build progress. We hope this blog post brings everyone up to speed and answers questions, as we have been getting inquiries to what all we have done up to this point.
Stay tuned! It’s about to get crazy.
Kudos to the following for getting us to this point:
- Ford Racing
- Late Model Restoration
- CJ Pony Parts
- Classic Design Concepts
- Prestige Mustang
- United Auto Collision
- Ice Nine Customs
For a full list of parts being used and our sponsors, go here!
